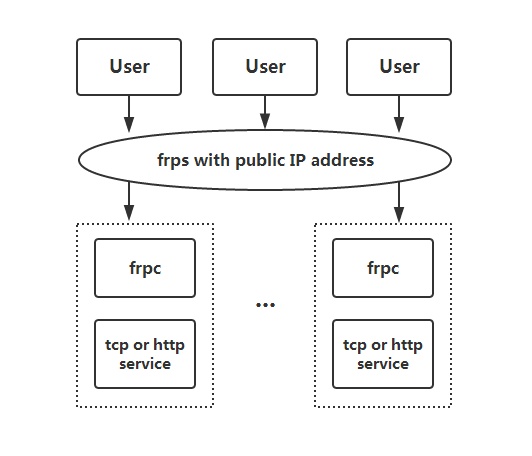
frp内网穿透
下载地址:https://github.com/fatedier/frp/releases
如https://github.com/fatedier/frp/releases/download/v0.22.0/frp_0.22.0_linux_amd64.tar.gz
服务端配置文件frps.ini
[common]
dashboard_user = user # 服务端控制面板访问账号和密码,不设置则默认admin admin
dashboard_pwd = password
# 客户端连接令牌
token = access_token123123
# 路由地址
subdomain_host = frp.123.com
###########下列配置默认即可,无需改动###############
#穿透监听端口与地址(0.0.0.0表示允许任何地址)
bind_addr = 0.0.0.0
bind_port = 7000
# udp协议监听端口
bind_udp_port = 7001
#udp协议支持kcp模式。kcp的运行端口,不设置表示禁用。可以与'bind_port'端口一致
kcp_bind_port = 7000
#虚拟主机穿透监听端口(指http与https的访问端口)
vhost_http_port = 80
vhost_https_port = 443
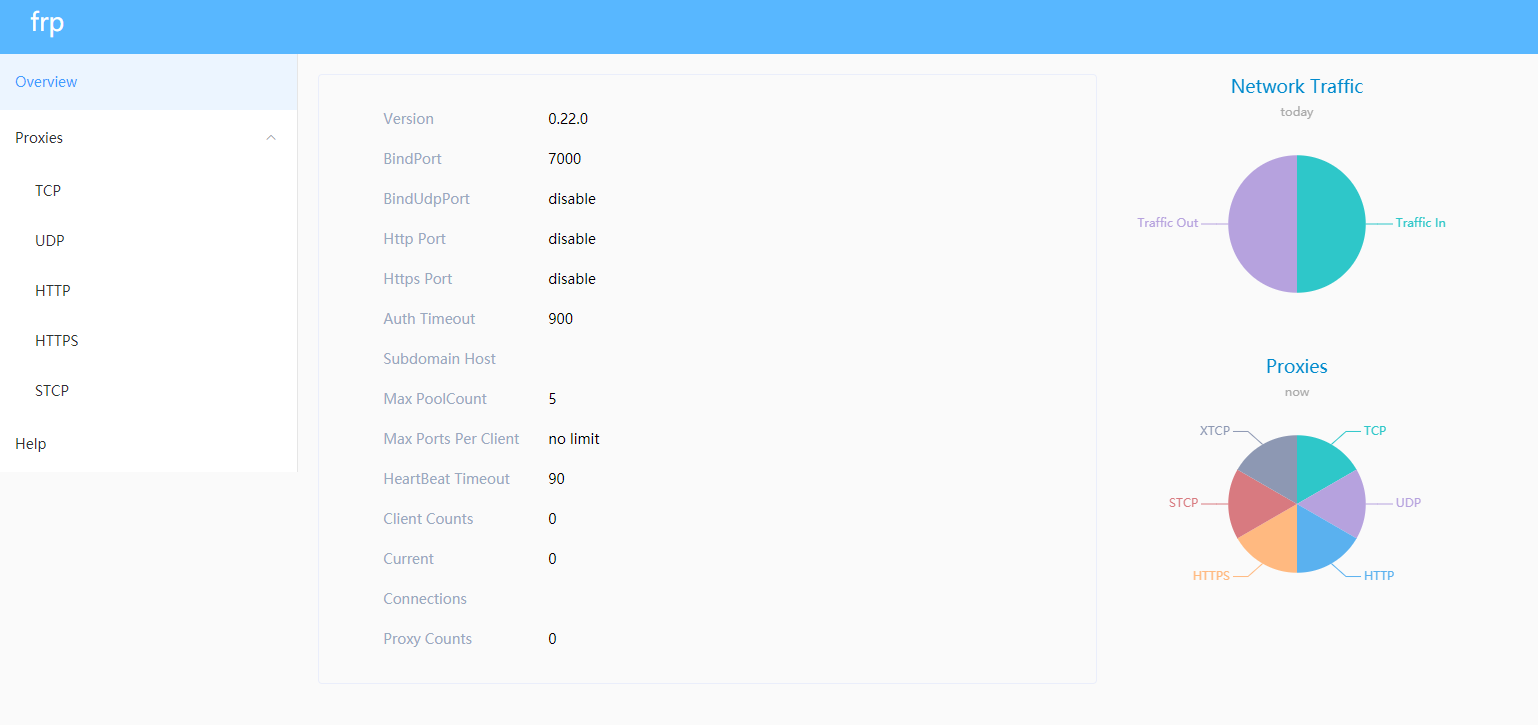
#服务端控制面板访问端口
dashboard_addr = 0.0.0.0
dashboard_port = 7500
# frp日志记录路径
log_file = ./frps.log
# 日志记录级别(trace, debug, info, warn, error)
log_level = info
# 日志记录滚动天数
log_max_days = 3
# 客户端与服务端连接心跳检测
heartbeat_timeout = 30
# 允许客户端使用的穿透端口,不设置则全部允许
#allow_ports = 1000-100000
# 穿透服务允许的连接数
max_pool_count = 5
# 单个客户端允许建立的穿透服务,0为不限制
max_ports_per_client = 0
# 连接超时
authentication_timeout = 900
# tcp流多路复用(可以理解为优化传输)
tcp_mux = true
启动:
./frps -c ./frps.ini
客户端的配置文件frpc.ini
[common] #[common为公共配置区域必须存在]
# 与服务端连接令牌
token = access_token123123
# 客户端标识
user = nas
#服务端的访问地址(可用ip或者域名)。
server_addr = 123.123.123.123

####################此处为common的默认配置区域无需修改###################
#服务端用于穿透的端口,与服务端保持一致。
server_port = 7000
# 日志记录路径
log_file = ./frpc.log
# 日志记录级别(trace, debug, info, warn, error)
log_level = info
# 日志记录滚动天数
log_max_days = 3
# frpc客户端管理界面
admin_addr = 127.0.0.1
admin_port = 7400
admin_user = admin
admin_passwd = admin
# 连接池
pool_count = 5
# tcp数据流多路复用,默认开启,服务端客户端需要保持一致
tcp_mux = true
# 失败重连
login_fail_exit = true
# 服务端与客户端通信协议,支持tcp\upd
protocol = tcp
# dns服务选用
# dns_server = 8.8.8.8
#客户端向服务端心跳检查间隔与超时时间
heartbeat_interval = 10
heartbeat_timeout = 90
##############以上为客户端服务的公共信息配置区域############

###############具体的穿透服务功能启用(表示你要使用frp的那个功能)##############
[ssh]
#穿透类型
type = tcp
#需穿透服务本地访问地址
local_ip = 127.0.0.1
#需穿透服务本地访问端口
local_port = 22
#是否使用通讯加密,默认false
use_encryption = false
#是否使用通讯压缩,默认false
use_compression = false
#穿透后外网访问端口。
remote_port = 6001

[dns]
type = udp
local_ip = 114.114.114.114
local_port = 53
remote_port = 6002
use_encryption = false
use_compression = false

#http或者https模式主要针对于虚拟主机,访问的取决于frps.ini文件中的vhost_http_port设置
[web01]
type = http
local_ip = 127.0.0.1
local_port = 80
use_encryption = false
use_compression = true
#虚拟主机访问账户密码设置,如果不设置的话。自己通过地址即可访问。
http_user = admin
http_pwd = admin
# if domain for frps is frps.com, then you can access [web01] proxy by URL http://test.frps.com
#如果你的frps域名是yourdomain.com,那么你可以通过web01.yourdomain.com 来访问web01这个穿透服务。
subdomain = web01
#自己定义域名
custom_domains = yourdomain.com
# locations is only available for http type
locations = /,/pic
# http重定向地址
host_header_rewrite = example.com
# http请求文件头
header_X-From-Where = frp

[web02]
type = https
local_ip = 127.0.0.1
local_port = 8000
use_encryption = false
use_compression = false
subdomain = web02
custom_domains = web02.yourdomain.com

[plugin_static_file]
type = tcp
remote_port = 6006
plugin = static_file
plugin_local_path = /var/www/blog
plugin_strip_prefix = static
plugin_http_user = abc
plugin_http_passwd = abc
启动:
./frpc -c ./frpc.ini
服务自启动:
vim /usr/lib/systemd/system/frps.service
# 内容如下
[Unit]
Description=frps daemon
After=syslog.target network.target
Wants=network.target

[Service]
Type=simple
#此处的路劲地址根据自己的实际放置的地址进行修改
ExecStart=/root/frp/frps -c /root/frp/frps.ini
Restart=always
RestartSec=1min

[Install]
WantedBy=multi-user.target

systemctl enable frps
systemctl restart frps